Sign Envelope Document(s)
To sign an envelope's document(s):
-
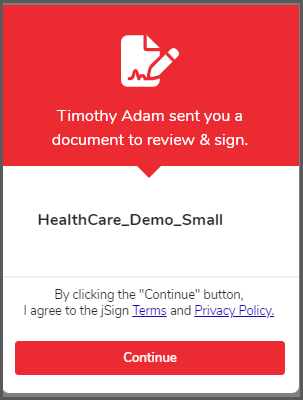
On the email signature invitation, click the Continue button to sign the document request.
-
Your document is ready for signing. Sign each page requiring your signature. Once signed, jSign automatically prompts you to proceed to the next document in your queue.

-
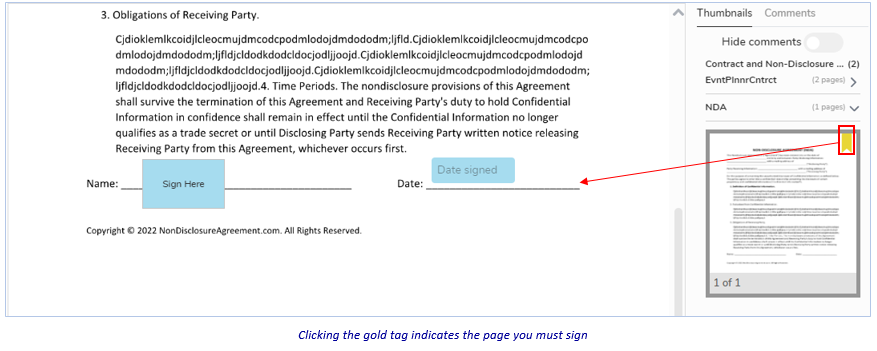
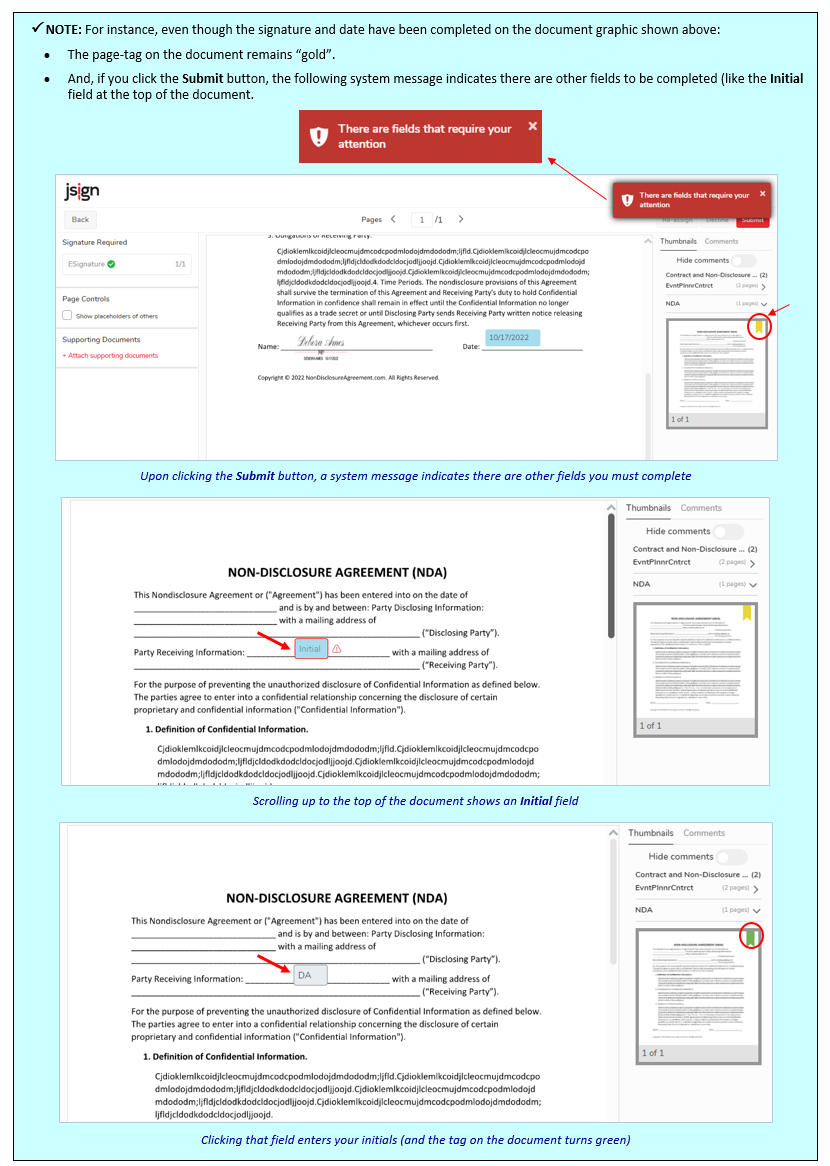
Look for the gold tag in the Thumbnails pane to the right, and click it. The document refreshes, displaying the placeholder for your signature (and other elements, if added).
-
Click the Sign Here placeholder (your name then displays)…
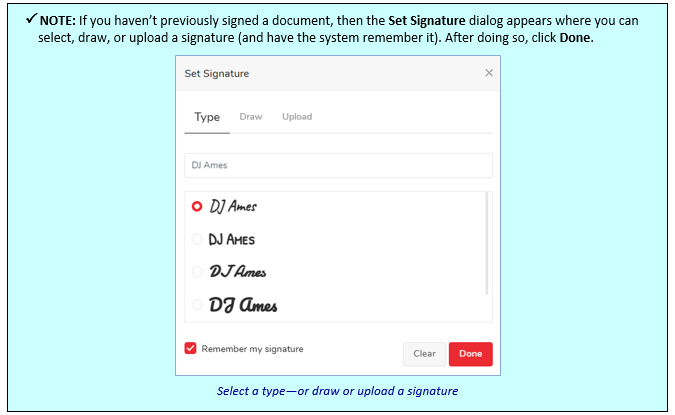
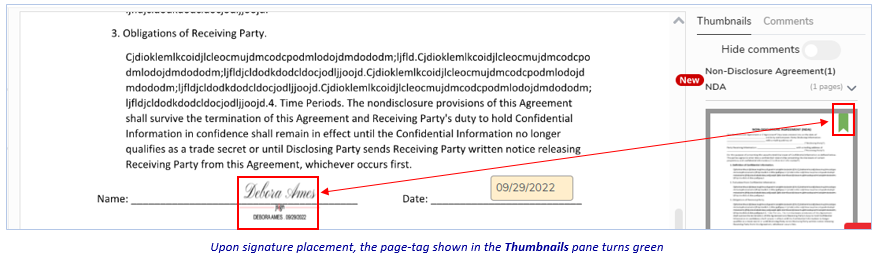
…then the Date placeholder (the current date displays). If those are the only fields on the document, the page tag on the document turns green.
Also:
-
If there are other fields to be filled in on the current document: Be sure to complete them (see the NOTE below). (When done with all fields, the page-tag on the document turns green.)
-
And—if there is more than one document that you must sign: Be sure to do so. Otherwise, you won't be allowed to submit the document.
-
-
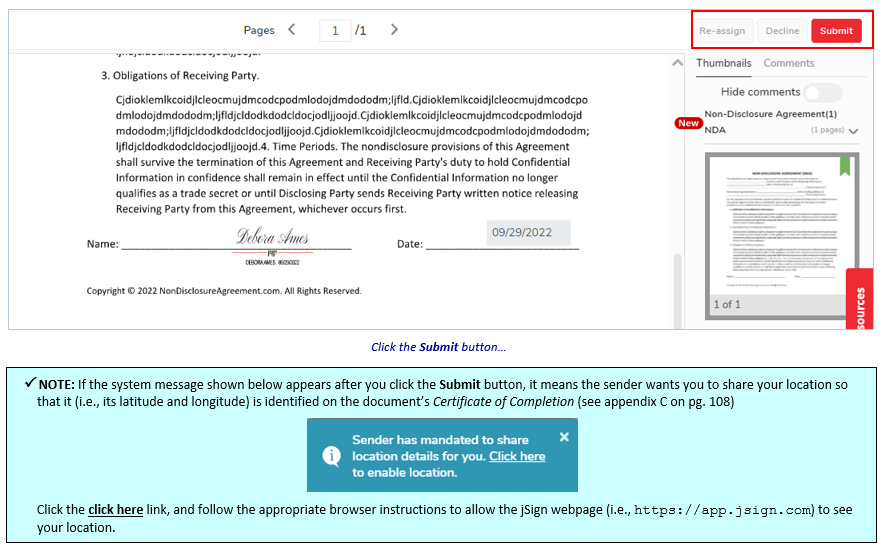
When completely done, click the Submit button at the top-right of the page.
-
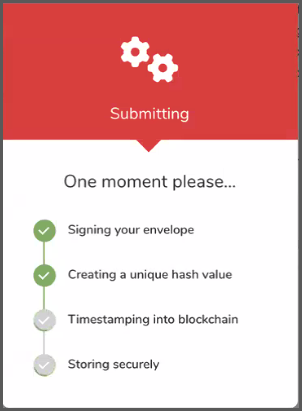
The Signing Process dialog begins automatically.
If there are additional documents in your queue that require signing, the following prompt appears. Click "Yes, sign now" to view and sign the next document in your queue.
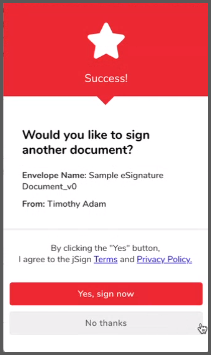
When you are done signing all documents in your queue, the Envelope Details page appears showing you have signed the document (and you can log out). (See appendix B for detailed information about the Envelope Details page.)

Related Topics